2023 July -Davrian update
I've been remiss in posting progress to the blog, but that doesn't mean we've been idle. We had set ourselves a goal of taking the Davrian to the Classic Car and Bike Show at Blyth this year and we'd have made it had the atrocious weather not made us abandon plans to go to the show. The car was, indeed, ready (just) and is currently being road tested, a little further each time, to build up our confidence in her. Here is a quick summary of the work completed since the last entry. As usual, photos with more detail are available by clicking the photos at the bottom of the page.
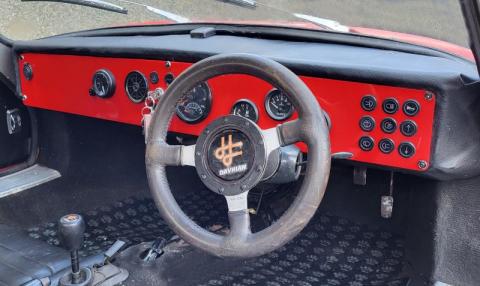
As reported last time the core of the dashboard had been refurbished ready for trimming which was completed quite quickly. The dash itself was then prepared, first using a piece of scrap mdf and then a final cut using the colour coded perspex. All gauges / switches were fitted and the complete unit offered up to the core and fitted (after some minor adjustments).

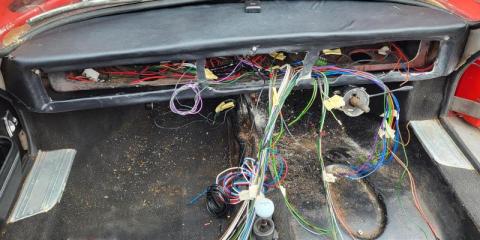
The dash was then removed and some primary wiring done on the workbench. The switches as well as the gauges all illuminate with sidelights so there were dozens (literally) of links that could be pre-wired along with power feeds and earths for the gauges. In fact, anything that could be wired ahead of connection to the loom was wired up while everything was easily accessible. The mocked up dash was then put to one side while we concentrated on the loom itself.
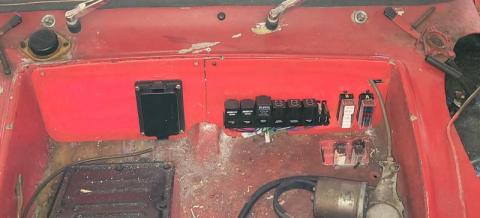
In general, the installation of the loom from Autosparks was pretty straightforward, if time consuming, as long as we worked through it methodically. The loom was first was laid out on the garage floor and we identified and labelled each circuit. A new bulkhead was made to house the fuse boxes and the bank of relays and once these were fitted to the car, the various branches of the loom were run to the four corners of the car. The new bulkhead has really tidied up the underbonnet area of the car.

There were a few circuits to be modified - for example the circuit for the fuel pump was, not unreasonably, bundled in with the "engine" wiring at the back of the car. Of course, the Davrian fuel pumps (one pump for each fuel tank) are at the front. In an effort to make as few modifications to the loom as possible we took on the tedious task of unpicking the fuel pump pair from the "engine" loom and redirecting it to the "front", then extending it to cater for two pumps. Once these and all other cabling laid to, more or less, where we wanted, it was all bound up with protective loom tape and we began connecting everything up.
Circuit by circuit we connected, and tested, fixing our few mistakes along the way, and finally brought the new cowl to the car ready for the final set of connections to the dashboard.

Notwithstanding everything being a bit more awkward, having to work on the dash in the car this final stage was soon completed too and the dashboard was fitted and the engine started

By now, we were pretty confident that we'd make the Blyth show so the legal paperwork was all completed. Being as old as she is, the Davrian is MOT exempt, and road tax is free, so within the day we were road legal. A final push of cleaning and refitting steering wheel, seats and a few trinkets (the golf ball gear lever knob has been consigned to history) and we were up and running. Only to be thwarted by the weather on the day.!
Click these photos for more detail!


